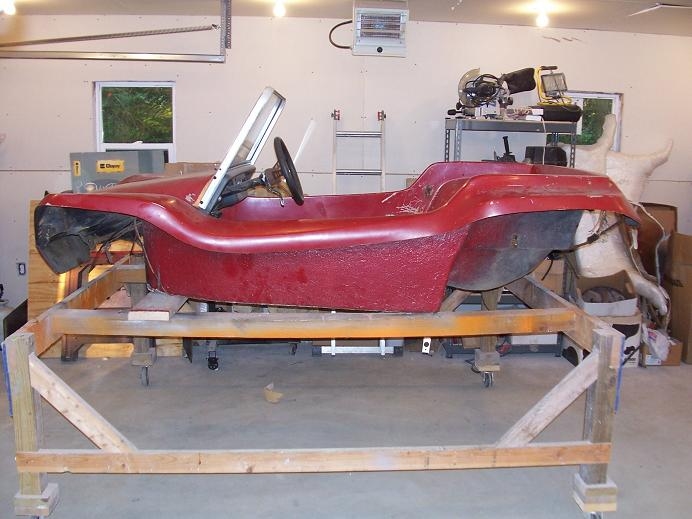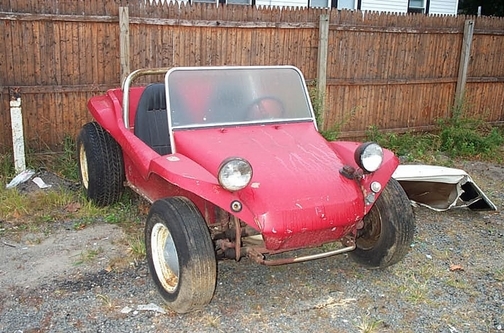
Jeff continues; It appeared complete, but certainly not even close to a runner. It had the Manx roll bar, the hard top, some really nice old school rims, and all the indicators of a true Manx. I loaded it up on the trailer and brought it back to Massachusetts where it sat patiently in my garage for 2.5 years while life's interruptions prevented its restoration. After getting some things in order, I dove head first into the project in June 2007. The first step was to separate the body from the chassis.

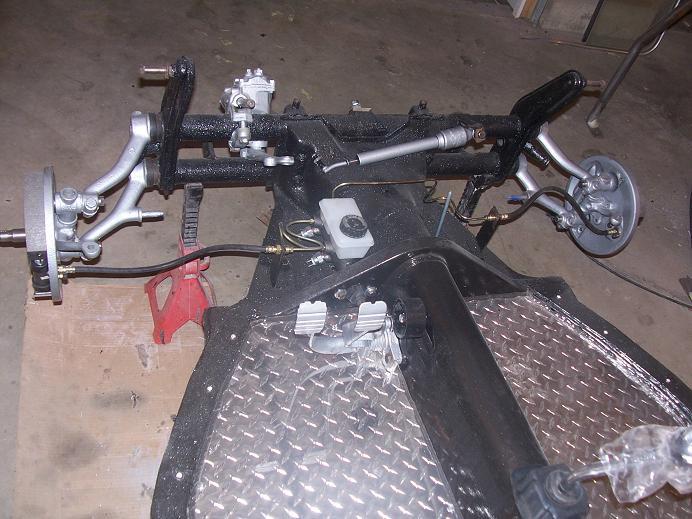
As you can see the floors had seen better days, the body was rough, and the mechanicals were gone: I use a simple ceiling mounted electric hoist from harbor Freight that handled the body, the motor, and the tranny without any effort. I began by rebuilding the chassis. Off came the pans, and anything else that could be removed. The tunnel, frame head, and rear horns were all very solid. I replaced the perimeter framing with 1x2" steel stock. I also used 5/32" polished diamond plate for the floors. They make a nice flat surface for the seats to mount to. All brake components were replaced or rebuilt. A new fuel line was run as well.
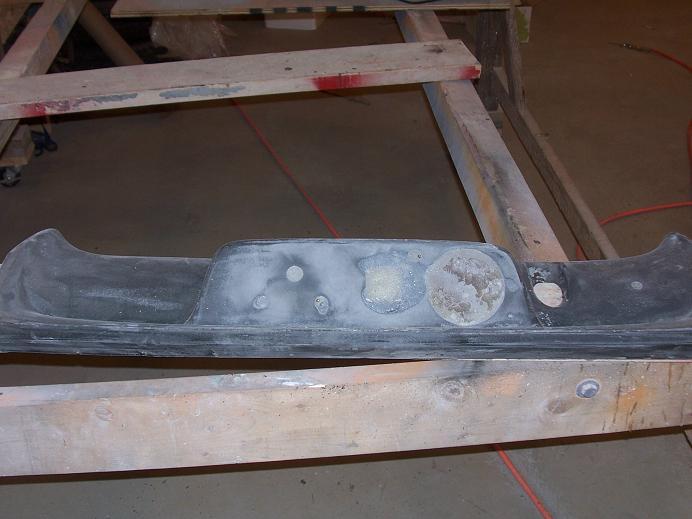
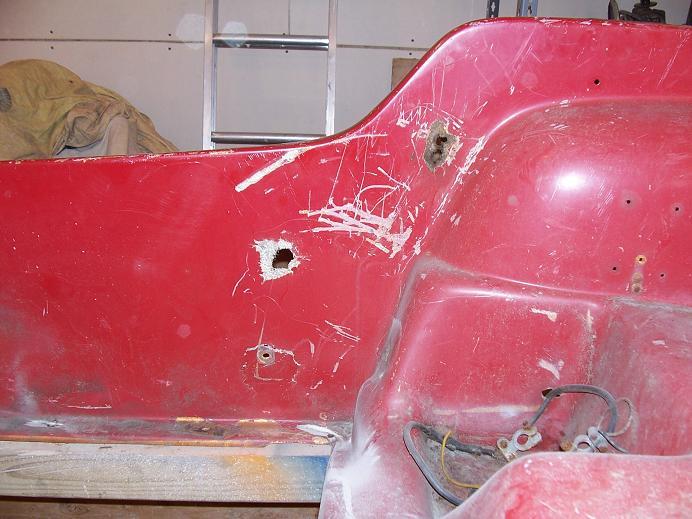
Adjusters were added to the front beam and the transmission was detailed. Tie rods, link pins, shocks, everything was redone. Anything that could be removed was, and then cleaned, sandblasted and painted. The center tunnel was smoothed with Rage Gold and painted. A new shift rod bushing was also installed. I repaired the original dash because I had plenty of materials and thought I would give it a try. I then turned my attention to the body. All the holes were fiber glassed and smoothed. I was pretty lucky, there were no big cracks or chunks missing, other then in the rear license plate area.
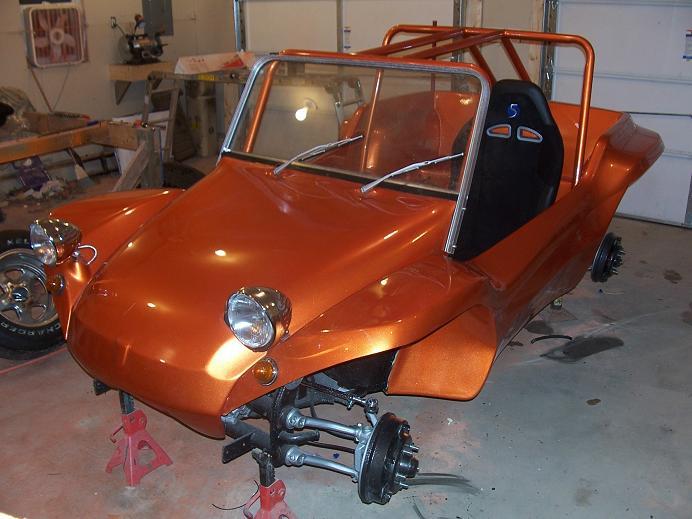
Every hole was countersunk, filled with glass, then Rage. Big holes were tapered, filled with glass, and then smoothed with Rage. After sanding, I primed with several coats of Evercoat G2 primer. This is great stuff. Sprays easily and sands really smooth. The original color was an orange metallic so I stuck with that theme and painted the body with Kirker Orange Metallic base and then clear. Next came some wiring, installation of motorcycle headlights, and the dash. I used motorcycle headlights because I wanted a little smaller of a look. The dash was painted with wrinkle paint to mimic the original ABS look.? I used Dolphin gauges because I like the price and the looks. Gauges are tach, speedo, oil pressure, volts, and fuel.
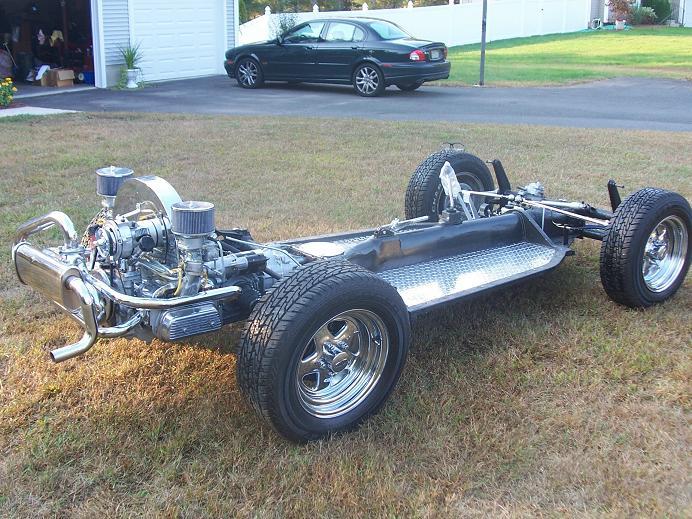
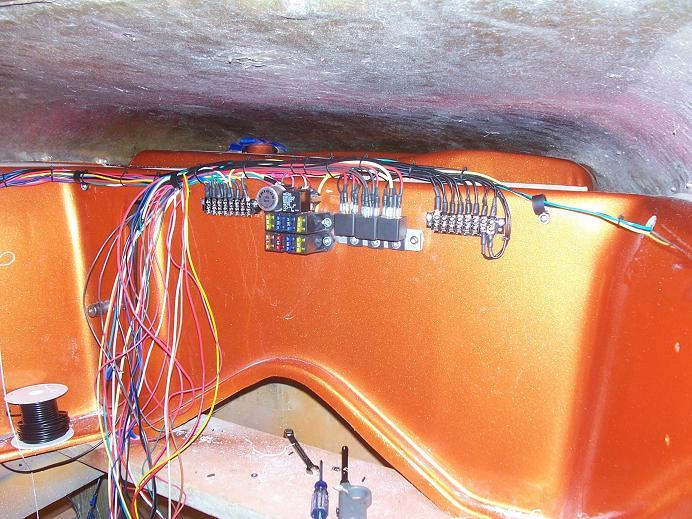
Relays were used for the headlights, wipers, horn, and flashers. I also use terminal blocks to bring all my grounds to one place (easy to diagnose the common ground issues on fiberglass buggies) and to distribute other power signals. I also installed a Flaming River stainless tilt column. It fit really well. I adapted it to the stock VW box with some Borgeson U-joints. I then brought the body and chassis together. I used almost all stainless steel hardware through-out the build. Seats from Factory Five Cobra were used along with 4 point cam-lock harnesses. A 12.5" steering wheel and billet adapter attach to the Flaming River column. The motor is a stock 1600 with the normal upgrades (Kadrons, 009, electronic module, oil cooler, chrome accessories, etc).
Overall its been a fun build. I have a couple of details to finish like an upholstered rear seat to be installed. I still haven't driven it due to the snow up hear in the Northeast, but I have sat in it and I fit very well (6'2" tall). I don't even look above the windshield!
Some things I would have done differently:
1. The steering set up is VERY nice...but VERY expensive. By the time you get the column, the joints, the adapters, etc, you are into it for $400+. I have 3 columns from a 1967 that would have worked just as well. It does look GREAT though. Money no object? Go this way.
Some things that worked out great: 1. The diamond plate floors. They cost less that $200 for all the aluminum and steel (via the internet) and allow for a lot more strength and room. 2. the Cobra seats. Nice and narrow with good support. They offer a lot of adjustment. 3. The Kirker paint. great price and a great product. I recommend them for any novice painter.