My Free Project

Show us your project. In progress or finished!

Moderator: Ken

My Free Project

Postby Pinball » 14 Mon Dec, 2009 11:30 pm

Image
Image
Image
Image
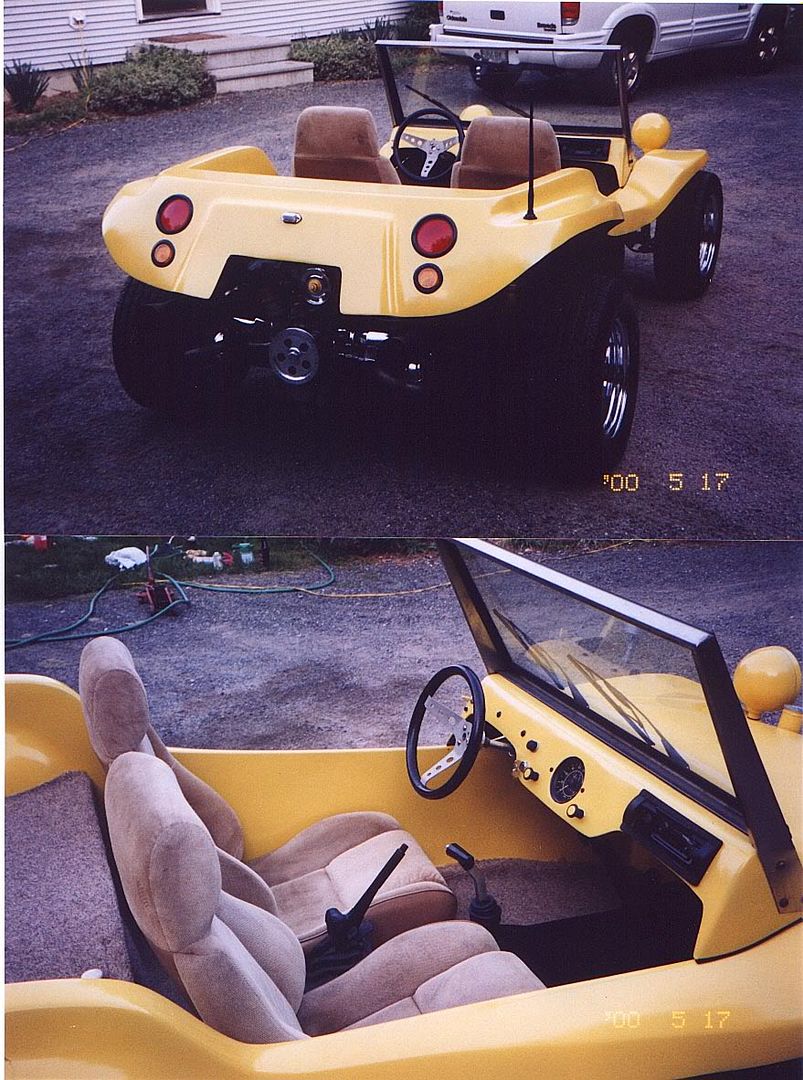
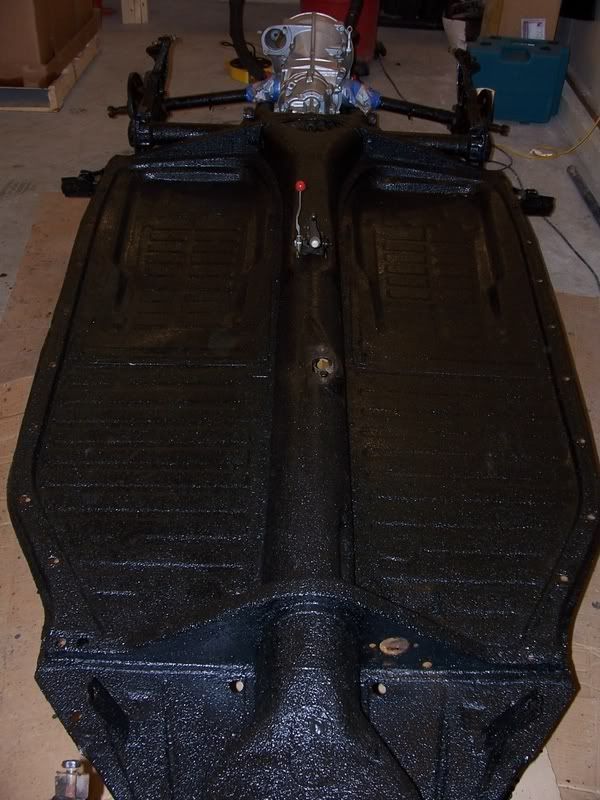
Here are a couple of pics of the body sitting on the shortened pan that a good friend of mine gave me a while back. Just now getting around to start on it, but I'm really excited about making atleast some progress. There is a '74 Super Beetle in the corner of the garage that will be donating it's power for the sake of the buggy. The body seems to be in pretty good shape. I'm in the process of removing the flaking, flat blue off the blue metalflake gelcoat. The only body I have seen similar to it is a Spyder, made by FibreCraft, but can't find anymore info on it. Let me know if any of you guys can supply any info or if you might know what it is. Also let me know what I did wrong that made the images on this post run horizontal instead of vertical. Ha!Ha!

Thanks,
Brian
Pinball
Buggy Dude
 
Posts: 9
Joined: 10 Sun May, 2009 11:18 am
Location: Dickinson, TX

Postby BrianB » 15 Tue Dec, 2009 5:58 am

After you attach each picture you need to hit enter to move down to the next line. I am assuming you are using Photobucket or something similar.
ThunderBug Buggy
BrianB
Buggyholic
 
Posts: 1010
Joined: 08 Tue Jan, 2008 9:49 am
Location: Katy Texas

Postby BrianB » 15 Tue Dec, 2009 6:05 am

By the way you can go here http://www.dunebuggyarchives.com/forum/forum.pl
to look up your buggy.
ThunderBug Buggy
BrianB
Buggyholic
 
Posts: 1010
Joined: 08 Tue Jan, 2008 9:49 am
Location: Katy Texas

Postby Don » 15 Tue Dec, 2009 8:30 am

You can see my thread on the Spyder here:

http://www.dunebuggyarchives.com/forum/topic_show.pl?pid=9100;hl=SPYDER#pid9100

Does your's have the bump in the rear seat? Your dash looks different than mine. Maybe it has been reworked?
1967 Dune Buggy - aka Shrek
User avatar
Don
Buggy Nut
 
Posts: 180
Joined: 06 Mon Aug, 2007 7:55 pm
Location: Pearland

Postby Pinball » 15 Tue Dec, 2009 9:51 am

Thanks, guys. Yeah, has the small hump in rear cargo area. Dash is different, but doesn't appear to have been reworked, (other than having a boat load of holes drilled.) The back side doesn't look like it has been disturbed. I'll be able to tell when I finish stripping paint. Any ideas on what I should use to fill holes in dash. I want to start with a clean slate, and not just slap a piece of aluminum over it. Awesome info on the manufacturer, Don. The address for Fiberglass Products Inc. is right down the street from the company I currently work for. Small world. Ain't it.

Thanks again,
Brian
Pinball
Buggy Dude
 
Posts: 9
Joined: 10 Sun May, 2009 11:18 am
Location: Dickinson, TX

Postby jspbtown » 15 Tue Dec, 2009 12:51 pm

For the dash I would repair it as follows:

1. Taper the endges of the holes about 1" back from the edge. The taper should go from the full thickness of the dash on one edge of the taper to paper thin on the hole side of the taper.
2. Using duct tape, tape pieces of wax paper on the back of the dash so the wax paper is the only thing that is exposed through the holes. You can clamp a piece of wood to the back of the dash to give the wax paper some support. This will make step 3 a little easier.
3. Lay in matt and resin into the holes. Build the repair slightly higher than the existing dash.
4. When cure use some 80 grit on a DA and sand the dash flat.
5. You can choose to give it a light skim coat with a quality filler and then sand and finish with a high build primer.

Here is a Manx dash that I repaired. Its ABS plastic but I used the same steps I just outlined.
Image
Image
Image
jspbtown
Buggyholic
 
Posts: 250
Joined: 26 Wed Dec, 2007 9:57 am

Postby Pinball » 15 Tue Dec, 2009 3:48 pm

Yeah, now that looks good. Normally I like the dash painted body color, but the wrinkle finish is really tough. Would look especially good if I painted the floorboard section of the pan the same. Thanks for the tip....looks great!!
Pinball
Buggy Dude
 
Posts: 9
Joined: 10 Sun May, 2009 11:18 am
Location: Dickinson, TX

Postby jspbtown » 15 Tue Dec, 2009 4:05 pm

Thanks. Here is what it looked liked installed:

Image

I also like the dash the same color as well:

Image

The wrinkle paint is not that tough. I would not use it for the floorpan. Herculiner has some nice texture is is really tough:
Image
jspbtown
Buggyholic
 
Posts: 250
Joined: 26 Wed Dec, 2007 9:57 am


Return to Member's Projects

Who is online

Users browsing this forum: No registered users and 27 guests